A CSS hack to Visual Studio Code to move the Debug Toolbar
This post is over a year old, some of this information may be out of date.
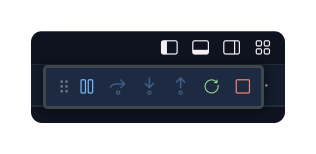
As developers, we’re always looking for ways to enhance our productivity and streamline our workflows. One thing which has bothered me endlessly is the floating Debug Toolbar. I love the fact that it is floating, but I have to move it out of the way every time I want to do something.

Many times I have been thinking to create an extension to move the Debug Toolbar to the titlebar, but I never got around to it. I was thinking about it again today, but unfortunatly, you cannot add CSS for the Visual Studio Code UI without a “hack”.

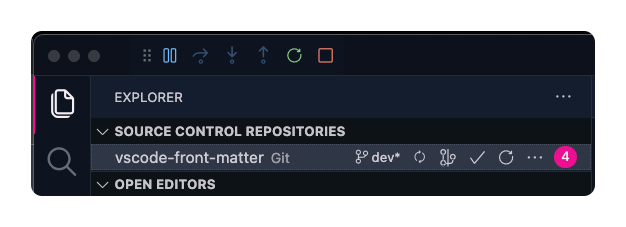
In this blog post, I’ll share the CSS hack I created to integrate the Debug Toolbar into the titlebar of Visual Studio Code. Follow along as we modify the workbench.desktop.main.css file to achieve this new layout.
Step 1: Create backup copies
Before we modify any files, it’s important to create backups. Open a terminal and run the following commands to copy the original workbench.desktop.main.css file and create a backup:
VSCODE_PATH="/Applications/Visual Studio Code.app/Contents/Resources/app/out/vs/workbench"cp -f "$VSCODE_PATH/workbench.desktop.main.css" "./workbench.desktop.main.css"cp -f "$VSCODE_PATH/workbench.desktop.main.css" "./workbench.desktop.main.backup.css"Step 2: Apply the CSS
Now that we have backups, it’s time to modify the workbench.desktop.main.css file. Run the following command to append the necessary CSS changes:
cat << EOF >> "./workbench.desktop.main.css"/* START - DEBUG TOOLBAR */.debug-toolbar { -webkit-app-region: no-drag !important; background: transparent !important; top: 2px !important; box-shadow: none !important; border: 0 !important;}"/* END - DEBUG TOOLBAR */"EOFThis CSS snippet modifies the Debug Toolbar’s appearance and positions it within the titlebar. The background property sets the toolbar color, top adjusts the position, and box-shadow and border remove any extraneous styling.
Step 3: Copy the modified file
Finally, we need to copy our modified workbench.desktop.main.css file back to the Visual Studio Code application folder. Run the following command:
cp -f "./workbench.desktop.main.css" "$VSCODE_PATH/workbench.desktop.main.css"Step 4: Restart Visual Studio Code
To see the changes, restart Visual Studio Code. You should now see the Debug Toolbar integrated into the titlebar once you start a debugging session!

You are still able to mode the Debug Toolbar, but you will have to hold the ctrl key + click and drag.
Related articles
Extension tip to bring Visual Studio Code to the foreground
In this article Elio explains how you can get Visual Studio Code to be brought back to the foreground.
Publishing web projects from Visual Studio Code to Azure with Git
Easily run SharePoint Framework related tasks in Visual Studio Code
Report issues or make changes on GitHub
Found a typo or issue in this article? Visit the GitHub repository to make changes or submit a bug report.
Comments
Let's build together
Manage content in VS Code
Present from VS Code
Engage with your audience throughout the event lifecycle
