Automating Microsoft 365 login with multi-factor authentication in Playwright tests
This post is over a year old, some of this information may be out of date.
I have been using Playwright to automate my tests for a long time, but one thing I struggled with was automating the login flow for Microsoft 365 with a multi-factor authentication (MFA) account. When using an MFA-enabled account, you must provide an additional manual step to complete the login process.
In my speaking sessions about Playwright, I have been saying it would be easier to use an account without MFA enabled, but only on a QA/test environment. But in reality, this is not always possible. Many companies have MFA enabled for all their accounts, and you need to deal with it. I decided to try it and see if it was possible to automate this.
In this post, I will show you how you can automate the login flow for Microsoft 365 with an MFA-enabled account using Playwright.
Playwright M365 starter template
To make it easier to follow along, I have created a Playwright M365 starter template, which you can use to test this out. You can find the template on GitHub: estruyf/testing-microsoft365-playwright-template.
Follow the installation steps in the README file to get the project running.
MFA-enabled account requirements
Before we start, we need an MFA-enabled account configured to use an authenticator app with a time-based one-time password (TOTP). The TOTP is a temporary code that changes every 30 seconds. This TOTP code is a common way to use MFA for various services but is also essential for this automation.
TOTP is an algorithm that generates a temporary code using a secret key and the current time. The best part about this algorithm is that we can make use of a library for Node.js called OTPAuth can be used to create the code, and this library allows us to automate the login flow.
Add a TOTP to your account
To add a TOTP to your account, you need to go to your account’s security settings. Here is how you can do it:
- Go to the Security info page of the account you want to use
- Click on the Add sign-in method button
- Select Authenticator app and click on Add
- Click on the I want to use a different authenticator app link
- Click on the Next button
- Click on the Can’t scan image? link
- Copy the Secret key and keep it safe as you will need it later
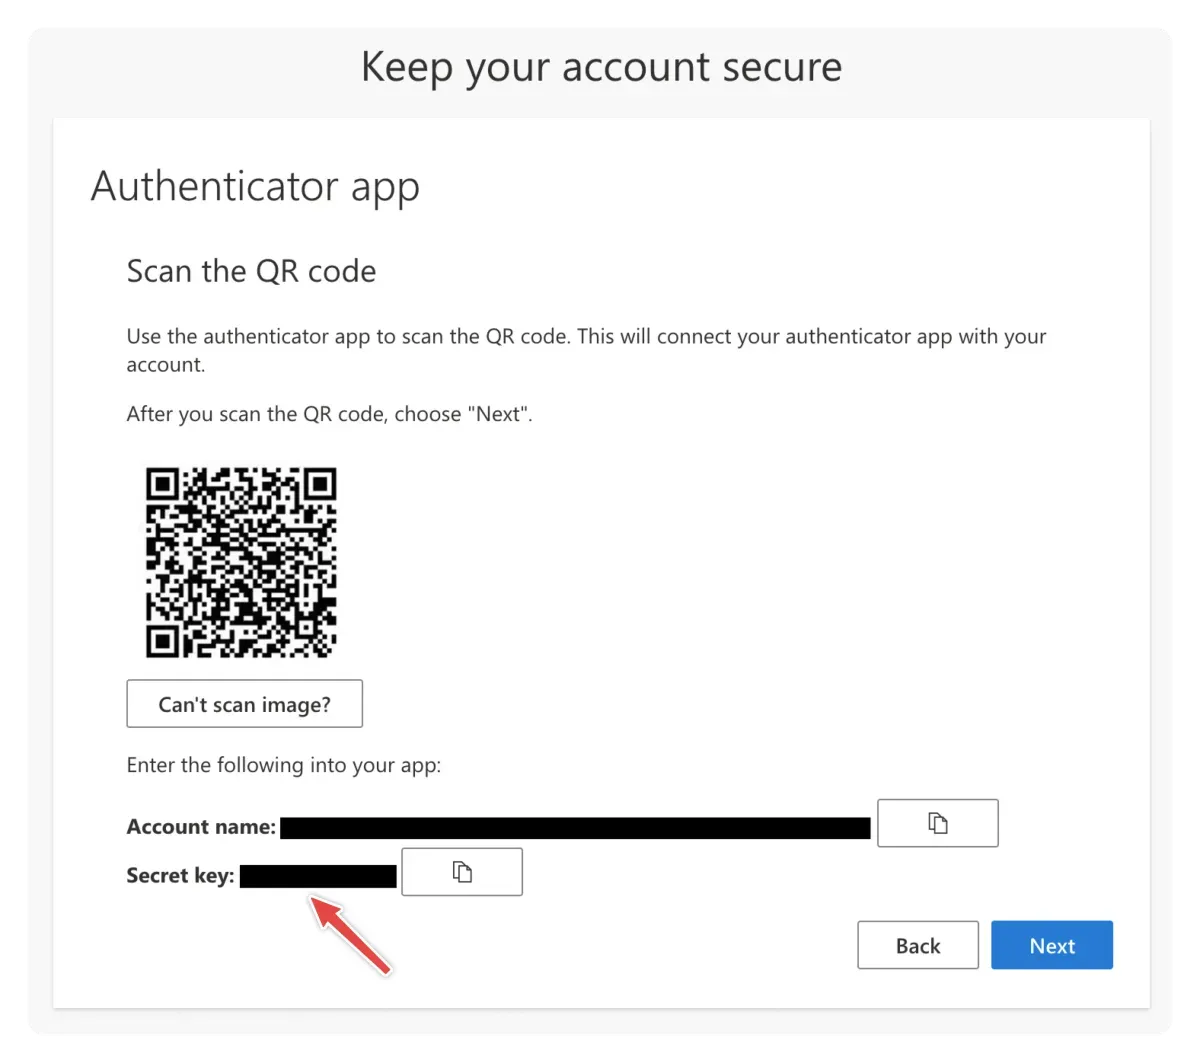
- Use your authenticator app to scan the QR code
- Click on the Next button
- Enter the code from your authenticator app and click on the Next button
If you want to use something other than an authenticator app to create the TOTP, the starter template also provides a script to generate the TOTP based on the secret key. You can run the following command to generate the TOTP:
# Replace `<secret key>` with the secret key you copied earlier.npm run generate:otp -- <secret key>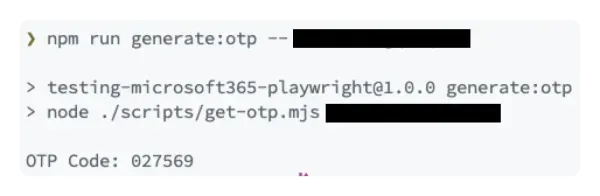
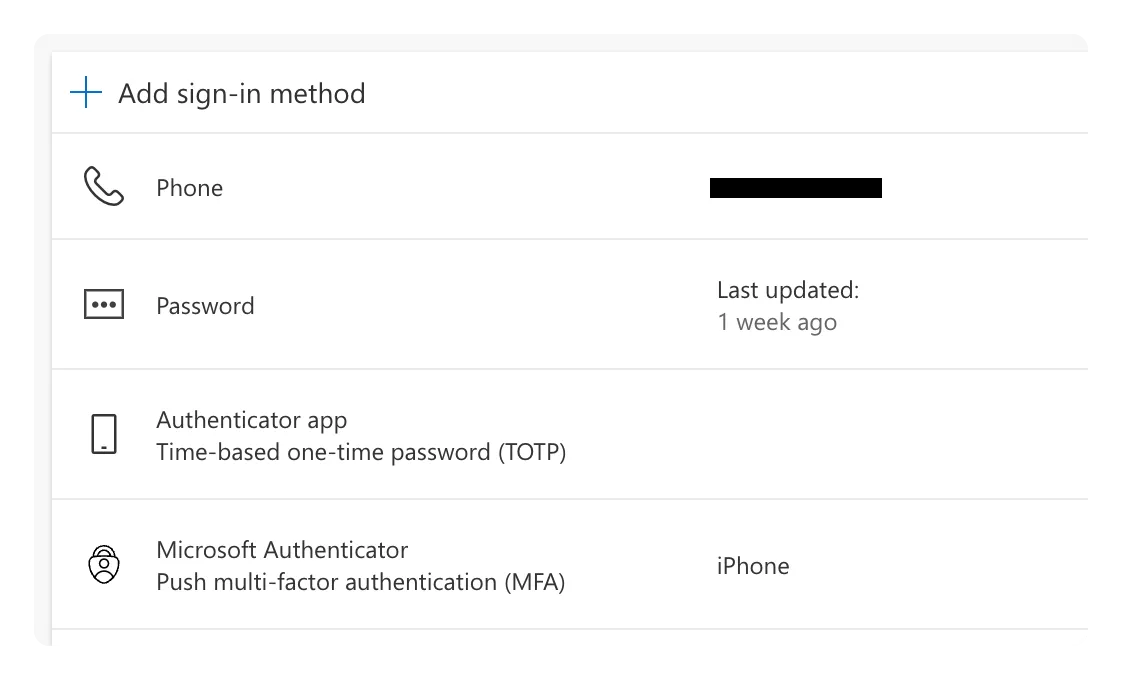
The Playwright M365 starter template allows you to configure both the Microsoft Authenticator and the TOTP authentication methods.
Automating the login flow
Once your account is configured with the TOTP, you can automate the login flow. To understand how the login flow works, let’s go through the steps:
- Open the login page
- Enter the email address
- Click on the Next button
- Enter the password
- Click on the Sign in button
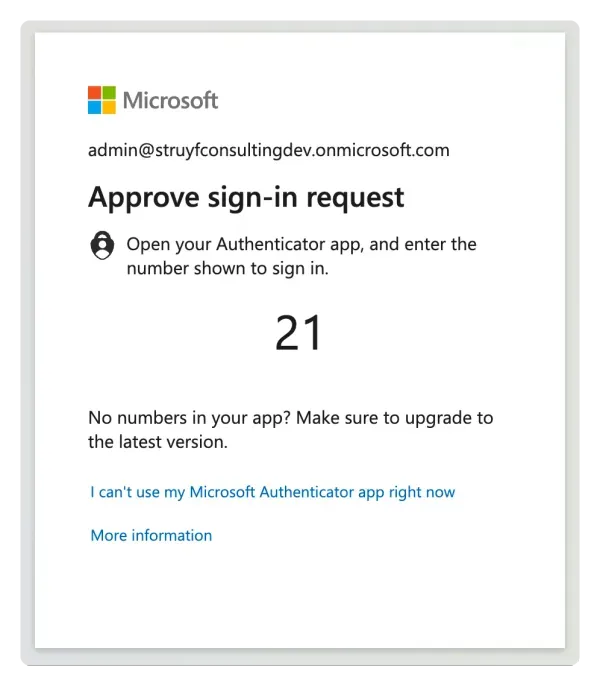
- Check if the account has the Microsoft Authenticator app configured
- If yes, click on the Use another authentication method link and select the TOTP option
- Enter the TOTP code
- Click on the Next button
- Click on the No/Yes button to stay signed in (it does not matter which one you choose for the tests)
Here is what it looks like in the code:
import { test as setup } from "@playwright/test";import * as OTPAuth from "otpauth";
const AuthFile = "playwright/.auth/user.json";
setup("authenticate", async ({ page }) => { // 1. Open the login page await page.goto(process.env.M365_PAGE_URL || "");
// 2. Enter the email address const emailInput = page.locator("input[type=email]"); await emailInput.click(); await emailInput.fill(process.env.M365_USERNAME || "");
// 3. Click on the "Next" button await page.getByRole("button", { name: "Next" }).click();
// 4. Enter the password const passwordInput = page.locator("input[type=password]"); await passwordInput.click(); await passwordInput.fill(process.env.M365_PASSWORD || "");
// 5. Click on the "Sign in" button await page.locator("input[type=submit]").click();
// 6. Check if the account has the Microsoft Authenticator app configured const otherWayLink = page.locator("a#signInAnotherWay"); await otherWayLink.waitFor({ timeout: 2000 }); if (await otherWayLink.isVisible()) { // Select the TOTP option await otherWayLink.click();
const otpLink = page.locator(`div[data-value="PhoneAppOTP"]`); await otpLink.click(); }
// 7. Enter the TOTP code const otpInput = await page.waitForSelector("input#idTxtBx_SAOTCC_OTC"); let totp = new OTPAuth.TOTP({ issuer: "Microsoft", label: process.env.M365_USERNAME, algorithm: "SHA1", digits: 6, period: 30, secret: process.env.M365_OTP_SECRET, }); const code = totp.generate(); await otpInput.fill(code);
// 8. Click on the "Next" button await page.locator("input[type=submit]").click();
// 9. Click on the "Yes" button to stay signed in await page.locator("input[type=submit][value='Yes']").click(); await page.waitForURL(process.env.M365_PAGE_URL || "");
await page.context().storageState({ path: AuthFile });});As you do not want to run the authentication flow before every test, it is configured as a separate login flow in the Playwright M365 starter template. It is defined as a dependency on other projects. You can find this configuration in the playwright.config.ts file:
const USE_MFA = process.env.M365_OTP_SECRET ? true : false;
export default defineConfig({ ... projects: [ { name: "setup", testMatch: USE_MFA ? /mfa.setup.ts/ : /login.setup.ts/,, }, { name: "chromium", use: { ...devices["Desktop Chrome"], viewport: { width: 2560, height: 1440, }, storageState: AuthFile, // Using the auth (storage state) file }, dependencies: ["setup"], // Setup will run first }, ],});Using the Playwright M365 starter template locally
To use the Playwright M365 starter template locally, you need to follow these steps:
- Have the project cloned on your machine
- Follow the installation steps in the README file
- Configure the
.envfile with the following variables:
# The URL you want to test (e.g., `https://<tenant>.sharepoint.com/`)M365_PAGE_URL=<the URL you want to test>M365_USERNAME=<your email address>M365_PASSWORD=<your password>
# When using the MFA login flowM365_OTP_SECRET=<the secret key you copied>- Run the tests using the following command:
npm test
# Or if you want to run the tests in the UI modenpm run test:uiHere is a video of the login flow in action:
Running tests in GitHub Actions
The Playwright M365 starter template provides a GitHub Actions workflow configuration for running the tests in a CI/CD pipeline. The workflow configuration is in the .github/workflows/e2e-testing.yml file.
To use the workflow, make sure to configure the following variables and secrets in your GitHub repository:
Variables
M365_PAGE_URL: The URL you want to test (e.g.,https://<tenant>.sharepoint.com/)
Secrets
M365_USERNAME: Your email addressM365_PASSWORD: Your passwordM365_OTP_SECRET: The secret key you copied
Conclusion
Automating the login flow for Microsoft 365 with an MFA-enabled account was easier than I thought. The Playwright M365 starter template provides a clean and reliable way to automate the login flow. This way, you can focus on writing your tests and not worry about the login flow.
You can find the Playwright M365 starter template on GitHub: estruyf/testing-microsoft365-playwright-template.
Related articles
Create GitHub issues on failed Playwright tests
Learn how to automatically create GitHub issues for failed Playwright tests with the Playwright Issue Creator action, available on the GitHub Marketplace.
E2E testing in MFA environment with Playwright auth session
Easily perform E2E testing in MFA environments using Playwright's authenticated session state. Learn how to automate your tests without logging in every time.
Automate the deployment of your SharePoint solution package in the App Catalog
Report issues or make changes on GitHub
Found a typo or issue in this article? Visit the GitHub repository to make changes or submit a bug report.
Comments

Let's build together
Manage content in VS Code
Present from VS Code
Engage with your audience throughout the event lifecycle