Authentication for Astro with Azure Static Web Apps
Azure Static Web Apps provides built-in authentication and authorization capabilities, making it easy to secure your Astro site and API endpoints using Microsoft Entra ID (previously Azure AD) authentication. In this guide, I will walk you through the process of setting up authentication, handling user roles, and testing everything locally.
Why use Azure Static Web Apps authentication?
With Azure Static Web Apps, authentication is managed for you, eliminating the need to handle OAuth flows, token storage, or authentication logic manually. Out of the box, Azure Static Web Apps provides:
- Easy role-based access control (RBAC)
- Built-in integration with Microsoft Entra ID (formerly Azure AD)
- Simple login/logout endpoints
- Automatic authentication handling for API routes
- Best of all, it is included in the free plan
Now, let’s dive into the implementation.
What we want to secure
For this guide, we will secure the following routes:
/success: A protected route that only users with theadminrole can access/api/*: A protected API route that only users with theadminrole can access
We also add the following routes to handle authentication:
/login: A login route that redirects users to the Microsoft Entra ID login page/logout: A logout route that logs users out of the application
The root route (/) will be left unprotected, allowing all users to access it and click the login button.
Step 1: Configure your routes and authentication settings
The first step is to configure your routes and authentication settings in the staticwebapp.config.json file.
Start by creating a staticwebapp.config.json file in your project’s root directory with the following contents:
{ "trailingSlash": "auto", "navigationFallback": { "rewrite": "/index.html" }, "routes": [ { "route": "/success", "allowedRoles": ["admin"] }, { "route": "/api/*", "allowedRoles": ["admin"] }, { "route": "/login", "rewrite": "/.auth/login/aad?post_login_redirect_uri=/success" }, { "route": "/logout", "redirect": "/.auth/logout" } ], "responseOverrides": { "401": { "redirect": "/login", "statusCode": 302 } }}This configuration does the following:
- Redirects unauthorized users to
/loginwhen they try to access protected routes (/success,/api/*) - Protects
/successand/api/*routes so only users with the admin role can access them - Defines a login route (
/.auth/login/aad), redirecting users to/successafter authentication - Provides a logout route (
/.auth/logout)
Step 2: Copying the configuration file to the build output
The staticwebapp.config.json needs to be copied to the output directory of the Astro site as the Static Web App CLI will not automatically do this for you. To achieve this, you can use an Astro config hook to copy the file to the output directory.
Creating the Astro config hook
Create a new file: ./app/utils/swaConfigIntegration.ts with the following content:
import type { AstroIntegration } from "astro";import { promises as fs } from "fs";import { join } from "path";
async function swaConfigIntegration(): Promise<void> { try { const __dirname = new URL(".", import.meta.url).pathname; const configPath = join(__dirname, "../../staticwebapp.config.json"); const destinationPath = join(__dirname, "../dist/staticwebapp.config.json"); await fs.copyFile(configPath, destinationPath); } catch (error) { console.error("Error copying SWA config file", (error as Error).message); }}
export default { name: "swaConfigIntegration", hooks: { "astro:config:setup": async () => { await swaConfigIntegration(); console.log("✅ SWA config integration complete"); }, },} satisfies AstroIntegration;Updating astro.config.mjs
With the SWA Config integration hook in place, you can update the astro.config.mjs file to include it to the build process:
// @ts-checkimport { defineConfig } from "astro/config";
import react from "@astrojs/react";
import tailwindcss from "@tailwindcss/vite";import swaConfigIntegration from "./utils/swaConfigIntegration";
// https://astro.build/configexport default defineConfig({ integrations: [react(), swaConfigIntegration],
vite: { plugins: [tailwindcss()], },});Step 3: Creating and updating the pages
Now that we have the configuration in place, we can continue by creating and updating the pages.
Updating the root page
On the root, we want to add a login button, that way, users can log in to the application. Update the ./app/src/pages/index.astro file with the following content:
---import Layout from "../layouts/Layout.astro";---
<Layout> <div class="flex items-center justify-center h-screen"> <a href="/login" class="bg-blue-500 hover:bg-blue-700 text-white font-bold py-2 px-4 rounded" > Login with Entra ID </a> </div></Layout>Creating the success page
In the routes above, when the user signs in, they will get redirected to a /success page. Create a success page ./app/src/pages/success.astro that users will see after logging in:
---import Welcome from "../components/Welcome.astro";import Layout from "../layouts/Layout.astro";---
<Layout> <Welcome /></Layout>Step 4: Testing the authentication locally
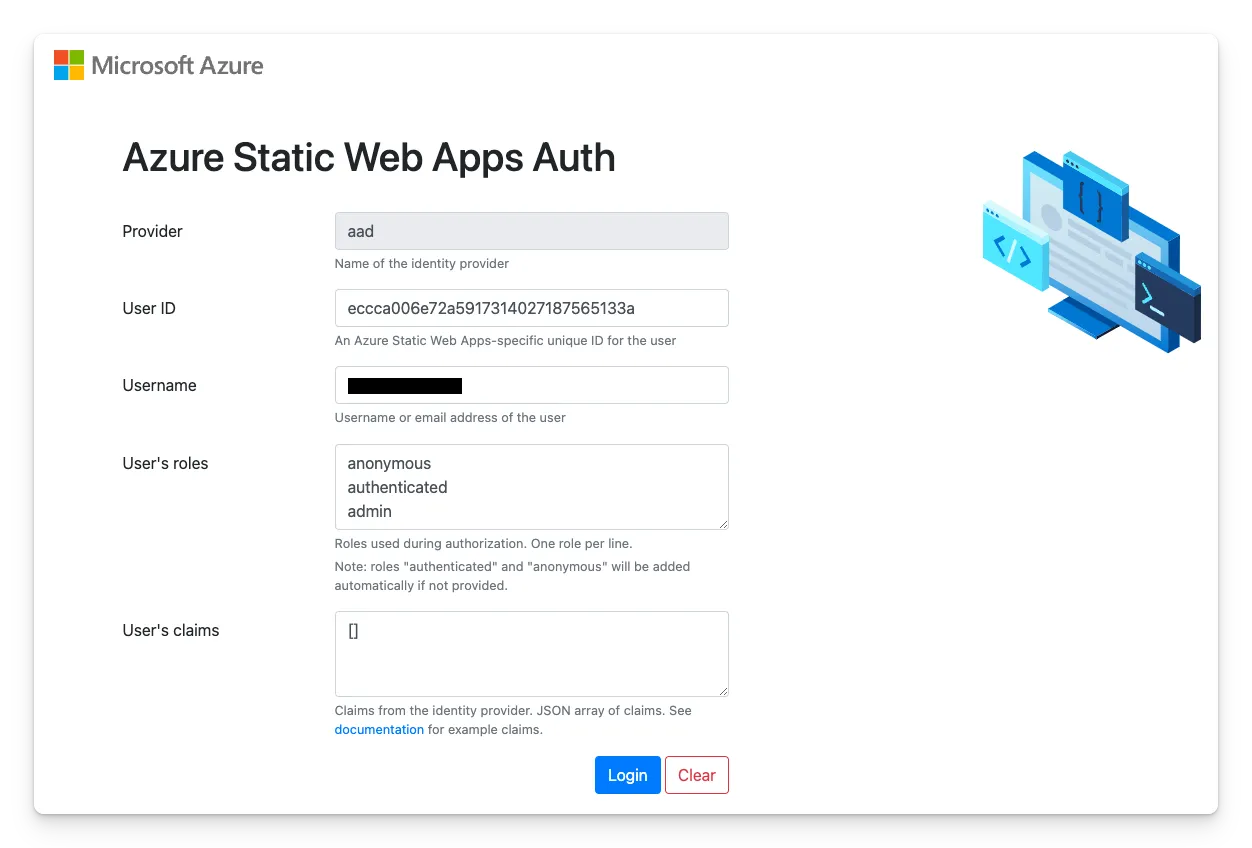
To test the authentication locally, you can use the Static Web Apps CLI. Run the following command in your terminal:
npm run devVisit http://localhost:4280, click the login button, and manually enter user claims in the authentication simulator.
Understanding the Authentication Flow
- Users visit your site and click the Login with Entra ID button
- They are redirected to
/.auth/login/aadfor authentication - Upon successful login, they are redirected to
/success - API endpoints (
/api/*) remain protected and require authentication
Step 5: Configure the user roles on Azure Static Web Apps
When you completed the local testing, you can configure the user roles on Azure Static Web Apps. Follow these steps:
- Open the Azure portal
- Navigate to your Azure Static Web App
- Click Role Management
- Select Invite and enter the user’s email
- Assign the admin role
- Click Generate and share the invite link with the user

Step 6: Time for the deployment
To deploy, you can use the same GitHub Actions workflow from the previous articles:
- Astro site deployment to Azure Static Web Apps with the CLI from GitHub Actions
- Integrating Azure Functions into your Astro site
Conclusion
Adding authentication to your Astro site with Azure Static Web Apps is straightforward (if you do not forget to add the config to your output folder). The built-in authentication system handles the complex security aspects while you can focus on building your application.
Related articles
Deploy Astro to Azure Static Web Apps from GitHub and CLI
Learn to deploy your Astro site to Azure Static Web Apps using GitHub and CLI for a seamless experience.
Change the Active Directory User Password Through SharePoint
Securing your Azure Functions with an existing Azure AD app
Report issues or make changes on GitHub
Found a typo or issue in this article? Visit the GitHub repository to make changes or submit a bug report.
Comments

Let's build together
Manage content in VS Code
Present from VS Code