Re-add the My Links Functionality as in SharePoint 2007 to Your 2010 Site
This post is over a year old, some of this information may be out of date.
Clients that migrate from SharePoint 2007 to SharePoint 2010 may miss the old My Links functionality in their “new” environment.
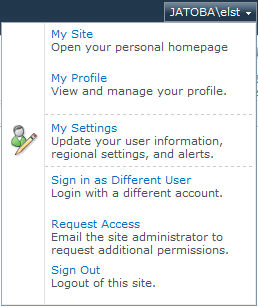
In SharePoint 2007, you had the option to add sites to your My Site by clicking on a link in the User Context Menu.

In SharePoint 2010 this option is not there anymore.
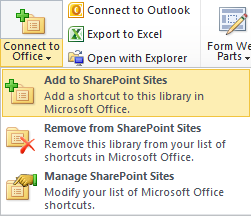
The functionality is still there, but only for adding libraries to My Links. It can be found on the Library tab -> Connect to Office -> Add to SharePoint Sites.
Laura Rogers made a blog post to make the My Links available on the My Site. Her post can be found on the following URL: SharePoint 2010 - Where’d “My Links” Go?.
But what if you want to add SharePoint sites or lists to the My Links section?
This requires some manual steps to add the links to the My Links section. Most of the clients would not like this, they just want it to work as in SharePoint 2007.
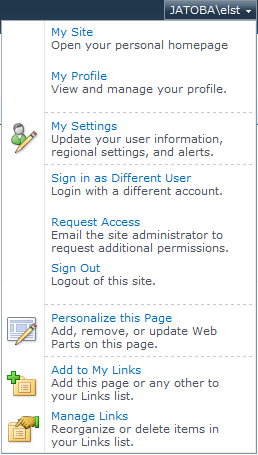
In this post I will explain my approach to “re-add” the same functionality like in SharePoint 2007. The result would look like this.
Add to My Links Custom Action
The first thing I will explain is how to add the Add to My Links option to the User Context Menu.
In SharePoint 2007, three pages were being used when you clicked on the Add to My Links. The first page that opened was the /_Layouts/QuickLinksDialog.aspx page. This page contained an iframe that opened the /_Layouts/QuickLinksDialog2.aspx that immediate did a form submission to the /_Layouts/QuickLinksDialogForm.aspx page.
These pages still exist in SharePoint 2010, but they give you some JavaScript errors. For this reason I created a new application page that automatically does a form submission with Query String variables.
This is the markup for the application page.
<html> <head> <title>Add Site to My Links</title> </head> <body> <form id="ctl00" target="_self" action="QuickLinksDialog2.aspx" method="post" name="ctl00"> <input id="QuickLinksTitle" type="hidden" value="" name="QuickLinksTitle"> <input id="QuickLinksUrl" type="hidden" value="" name="QuickLinksUrl">
<script language="Javascript"> var form = document.forms[0];
form.QuickLinksTitle.value = queryString('Title').replace(/%20/g, " "); form.QuickLinksUrl.value = queryString('URL');
form.action = queryString('Source') + '/_layouts/QuickLinksDialogForm.aspx'; form.submit();
//Retrieve the query string variable function queryString(name) { name = name.replace(/[\[]/, "\\\[").replace(/[\]]/, "\\\]"); var regexS = "[\\?&]" + name + "=([^&#]*)"; var regex = new RegExp(regexS); var results = regex.exec(window.location.href);
if (results == null) return ""; else return results[1]; } </script>
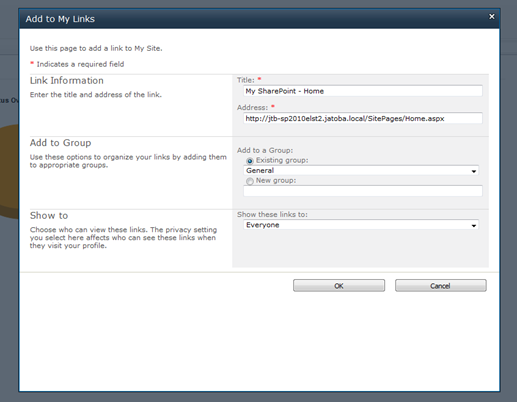
</form> </body></html>The next step is to create a custom action that adds a link to the User Context Menu. To make it SharePoint 2010 “friendly”, the application page will be opened in a common dialog window. For this I created a small JavaScript function that can easily be called from the custom action.
function Mylinks_Dialog(siteURL, Title, URL) { var options = { title: "Add to My Links", showClose: true, allowMaximize: false, autoSize: true, url: siteURL + '/_layouts/estruyf.mylinks/estruyf.QuickLinksDialog.aspx?Title=' + Title + '&URL=' + URL + '&Source=' + siteURL }; SP.UI.ModalDialog.showModalDialog(options);}This JavaScript function is also added by a custom action. The custom action markup looks like this.
<CustomAction ScriptSrc="/_layouts/estruyf.mylinks/estruyf.mylinks.js" Location="ScriptLink" Sequence="100"></CustomAction>The last step is to add the custom action which adds the Add to My Links option to the User Context Menu. The custom action markup looks like this.
<CustomAction Id="estruyfAddLink" GroupId="PersonalActions" Location="Microsoft.SharePoint.StandardMenu" Sequence="1" Title="Add to My Links" Description="Add this page or any other to your Links list." ImageUrl="/_layouts/images/ctoa32.png"> <UrlAction Url="javascript:Mylinks_Dialog('{SiteUrl}', document.title, window.location.href);" /></CustomAction>As you can see in the UrlAction the Mylinks_Dialog function is called. This would give the following result in SharePoint.
Manage Links Custom Action
Now that I explained you how to add the Add to My Links, the next step is to add the Manage Links option to your site. This is an easy step, because you only need to create a custom action that links to the /_Layouts/MyQuickLinks.aspx page. This is the same page that is used as in SharePoint 2007.
<CustomAction Id="estruyfMyLinks" GroupId="PersonalActions" Location="Microsoft.SharePoint.StandardMenu" Sequence="2" Title="Manage Links" Description="Reorganize or delete items in your Links list." ImageUrl="/_layouts/images/ctom32.png"> <UrlAction Url="~site/_layouts/MyQuickLinks.aspx" /></CustomAction>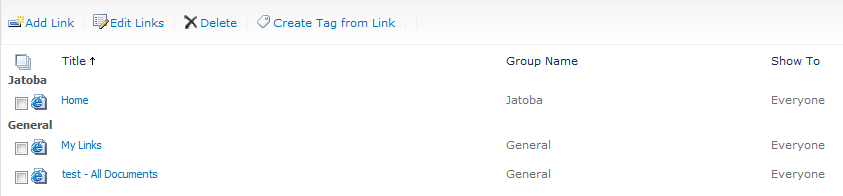
Files
If you want to install this solution you can download the my SharePoint 2010 solution file.
Deploy the solution to your SharePoint environment and activate the following site collection feature: estruyf MyLinks Feature.

If you want to make changes to the code, here is my Visual Studio project.
Useful Links
My Links missing in SharePoint 2010
SharePoint 2010 - Where’d “My Links” Go?
Updates
Changes: 2/02/2012
Solution file and code is updated to solve the Access Denied error Manjiri Patil had discovered. This was due to the fact that the application page was using an incorrect URL.
Related articles
Quick Tip: Custom Action Tokens in SharePoint 2010 Designer
Creating a NuGet Package to Automate the SharePoint Solution Creation Process.
SharePoint Designer Workflow Action: Retrieve the File Extension
Report issues or make changes on GitHub
Found a typo or issue in this article? Visit the GitHub repository to make changes or submit a bug report.
Comments

Let's build together
Manage content in VS Code
Present from VS Code