Part 2: Adding Refinement Actions to the Custom Search Refiner Control
This post is over a year old, some of this information may be out of date.
In the previous post I explained how to create your first search refiner control template. The template that was created wasn’t that useful, because it missed the refinement actions. In this post I explain how to add these refinement actions to your template and what to do once results are refined.
Note: For this post I’m going to use that display template as the starting point for this post. Here you can download it directly: Custom Search Refiner Control.
Adding Refinement Actions
There are a couple of ways to add refinement actions and they depend on the structure they is used. In this post I’m going to create them as hyperlinks. To start, the ShowRefiner function needs to be modified to create these hyperlinks, the code looks like this:
<!--#_function ShowRefiner(refinementName, refinementCount, refiners, method) { // Create the onClick event var onClickEvent = "$getClientControl(this)." + method + "('" + $scriptEncode(Sys.Serialization.JavaScriptSerializer.serialize(refiners)) + "');"; // Check if the refinement contains results if (refinementCount != null) {_#--> <div><a href='javascript:{}' onclick='_#= onClickEvent =#_'>_#= $htmlEncode(refinementName) =#_ (_#= refinementCount =#_)</a></div><!--#_ }}_#-->As you can see in the code, the method to add these refiners is the addRefinementFiltersJSON, which as the name suggests adds the refinement to the results.
Note: I’ll explain these method in part 5 of this blog series.
To make use of the updated ShowRefiner function, you’ll need to add some parameters to the function call (the refiner tokens that are used to do the refinement of the results, and the refinement method that needs to be executed):
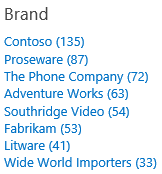
ShowRefiner(filter.RefinementName, filter.RefinementCount, refiners, 'addRefinementFiltersJSON');The function will now create hyperlinks. Once you click on one of these links, the onclick event triggers the results to refine. The HTML mark-up of the links looks like this:
<a onclick="$getClientControl(this).addRefinementFiltersJSON('{\u0022Brand\u0022:[\u0022\\\u0022\u01C2\u01C2436f6e746f736f\\\u0022\u0022]}');" href="javascript:{}">Contoso (135)</a>
Reset the Current Refinement
Now that the hyperlinks are in place, it’s possible to refine the search results, but once you do this, you’ll end up with an empty refinement control.

The next thing to do is to show a hyperlink to reset the current refinement.
For this you’ll need a new HTML block that becomes visible once the results are refined. This can be achieved by checking the following things:
- Check if the selected array contains values (selectedFilter):
selectedFilters.length > 0- OR - Check if there’re refinement tokens in use for the current search refiner control:
var currentRefinementCategory = ctx.ClientControl.getCurrentRefinementCategory(ctx.RefinementControl.propertyName);// Check if the object is null or undefined && Count the tokens currently in placevar hasAnyFiltertokens = (!Srch.U.n(currentRefinementCategory) && currentRefinementCategory.get_tokenCount() > 0);The statement looks like this:
if (selectedFilters.length > 0 '' hasAnyFiltertokens) {_#--> <div id='SelectedSection'><!--#_
_#--> </div><!--#_}Now let’s add a hyperlink to remove the current refinement. To remove the current refinement, the updateRefinersJSON method will be used. You also have a removeRefinementFiltersJSON method, but this needs the exact refinement token that needs to be removed. The approach with the updateRefinersJSON method is to give a null value to the refinement.
if (selectedFilters.length > 0 && hasAnyFiltertokens) {_#--> <div id='SelectedSection' class='ms-ref-selSec'><!--#_ var refinerRemoval = new Object(); // Set a null value to remove the current refining refinerRemoval[ctx.RefinementControl.propertyName] = null; ShowRefiner('Remove refinement', null, refinerRemoval, 'updateRefinersJSON');_#--> </div><!--#_}The last thing to do is to do a small modification to the ShowRefiner function.
<!--#_function ShowRefiner(refinementName, refinementCount, refiners, method) { // Create the onClick event var onClickEvent = "$getClientControl(this)." + method + "('" + $scriptEncode(Sys.Serialization.JavaScriptSerializer.serialize(refiners)) + "');"; // Check if the refinement contains results if (refinementCount != null) {_#--> <div><a href='javascript:{}' onclick='_#= onClickEvent =#_'>_#= $htmlEncode(refinementName) =#_ (_#= refinementCount =#_)</a></div><!--#_ } else {_#--> <div><a href='javascript:{}' onclick='_#= onClickEvent =#_'>_#= $htmlEncode(refinementName) =#_</a></div><!--#_ }}_#-->This will result in the following output:

Show the Selected Refinement
The same approach as the unselected loop will be done. The only difference is that you need to enumerate the selectedFilters array, and in this loop the removeRefinementFiltersJSON method can be used because you know the exact tokens.
for (var i = 0; i < selectedFilters.length; i++) { var filter = selectedFilters[i]; if(!$isNull(filter)) { var refiners = new Object(); refiners[filter.RefinerName] = filter.RefinementTokens; ShowRefiner('Remove ' + filter.RefinementName, filter.RefinementCount, refiners, 'removeRefinementFiltersJSON'); }}This script results in the following output when you’re going to refine the results.


Download
Download the complete search refiner control here: Custom Search Refiner Control Part 2.
Part 3: File Type Refinement
Right now we created a fully functional display template that can be used to set an unset the refinement. This template works with every search data type, but there is own data type that need special attentions. This is the FileType search data. In the next post I’ll describe to which things you need to pay special attention to when you want to use the FileType search data type.
Blog posts in this series:
- Part 1: Create your first search refiner control template
- Part 2: Adding Refinement Actions to the Custom Search Refiner Control
- Part 3: Working with File Types in the Search Refiner Control Template
- Part 4: Create a dropdown refiner control
- Part 5: The Search Refiner Control Methods Explained
- Part 6: Create a Multi-Value Search Refiner Control
- Part 7: Working with Ranges in the Search Refiner Control
Related articles
Part 1: Create Your First Search Refiner Control Template
Part 3: Working with File Types in the Search Refiner Control Template
Part 4: Create a Dropdown Search Refiner Control
Report issues or make changes on GitHub
Found a typo or issue in this article? Visit the GitHub repository to make changes or submit a bug report.
Comments
Let's build together
Manage content in VS Code
Present from VS Code
