Consuming an Azure AD secured web API from your web app / native app
This post is over a year old, some of this information may be out of date.
Probably one of the great things about App Service is that you can easily secure your applications via Azure Active Directory. Securing a Web API or API App can easily be achieved by enabling the app service authentication option and selecting Azure Active Directory. The express configuration only requires a few clicks until you have it all up and running.

Once this security option is enabled and navigate to your web API or web app, you should see the Microsoft login page before you can consume it.
Last week I was working on a couple of samples which show how you can consume these secured web APIs from within a web app and native application. The process itself is straightforward, but it is not so convenient to get it configured from the new Azure portal (maybe it is just me). The process itself is similar to what you would do when configuring Azure AD application permissions for other APIs like the Microsoft Graph API, SharePoint, … The problem here is that you only see the APIs that Microsoft is pushing, but not your custom ones.
Background information
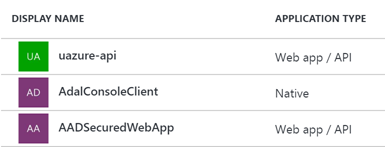
In my scenario, I started with the following Azure AD applications:

- uazure-api: is the Azure AD application which has been automatically been created when I secured my API via the Azure AD express configuration. Nothing should be configured on this application anymore.
- AdalConsoleClient and AADSecuredWebApp: these are my two sample applications which should consume the uazure-api web API. These two require some configuration.
Configuring your Azure AD application to consume the web API
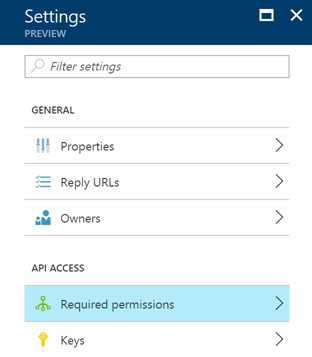
Once you configured your Azure AD application, open it in the Azure Portal and click on required permissions from the settings panel.

By default, you should have the following configuration for the Azure AD application:

On this tab, you should click on the add link at the top. This will open a new tab where you can select an API you want to access. It results in the following set of available APIs:

Now as you can see, you cannot select your custom API in the list. The trick is that you have to search for it by its name. In my case: uazure-api.

Once you select it, you can give it the delegated permission set to access the API via your Azure AD app.

This is all the configuration which is required. Now that this is configured, you should be able to call the API the same way as how you would call the Microsoft Graph.
An example of getting an access token and calling the API
Here is some sample code of my console application:
var authority = "https://login.microsoftonline.com/<tenant-id>";var clientID = "<client-id>";var redirectUrl = "https://<tenant>.onmicrosoft.com/app/webapiconsoleclient";var resource = "https://<URL-of-your-webapi>";
var authContext = new AuthenticationContext(authority);var result = await authContext.AcquireTokenAsync(resource, clientID, new Uri(redirectUrl), new PlatformParameters(PromptBehavior.Always));
string authToken = result.AccessToken;I hope this article helped you, happy coding!
Related articles
Report issues or make changes on GitHub
Found a typo or issue in this article? Visit the GitHub repository to make changes or submit a bug report.
Comments
Let's build together
Manage content in VS Code
Present from VS Code
