Combining multiple Office Apps into one global add-in
This post is over a year old, some of this information may be out of date.
The first thing when you create a new Office App is that you have to choose which type of app you want to create. You have the following app shape types you can choose of:
- Task pane
- Content
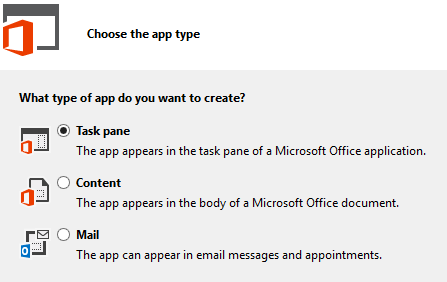
Each of these app shape types is designed for a specific application. For example the mail type is only for Outlook and cannot be used for Word, PowerPoint, and Excel.
If you create an app in Visual Studio, it will always create two projects, an Office Manifest project and a website. But what if you want to create an app that should do exactly the same thing in a mail context as in a task pane app context?
You could of course create two apps, but that also requires you to run two website instances. Now you can also do it with only one website. In the next sections I describe how I have achieved this.
Explaining how it can be achieved
First of all you need to add a new app shape to your existing app project. In this example I have already a mail app created. Here is how my app project looks like in Visual Studio:

Now when you add a new app shape to the existing project (for example a task pane app) you get the following result:
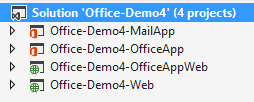
As you can see, another website (Office-Demo-OfficeAppWeb) is created for the new app. This website can be removed. Once the app website is removed from your solution, the reference for the app manifest will also be removed.
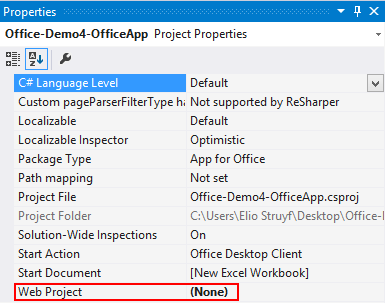
What you have to do is set it to the website in your current project. You can do this in the properties window of the app manifest project.
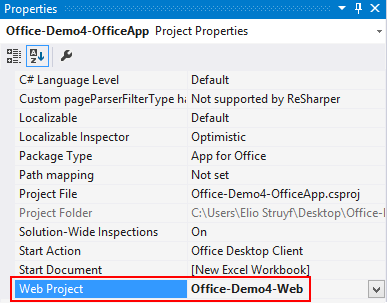
Once this is done, your two app manifests reference the same app website. If you do a test run, your mail app and task pane app should show the same page:
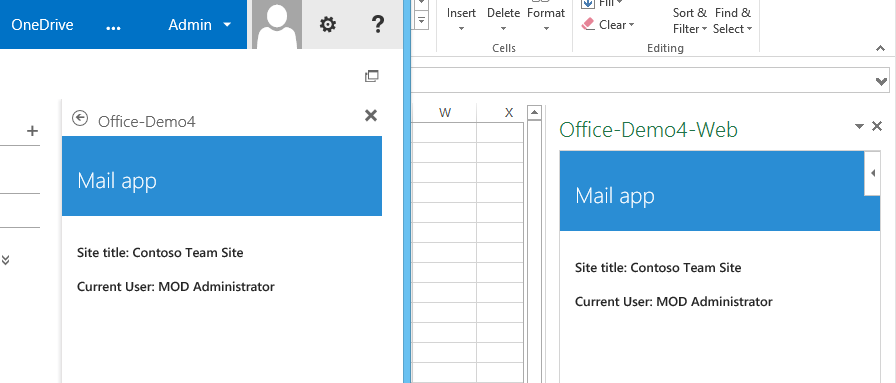
Now depending on the app type you choose, you could do different things with the Office API. Like for example within a mail app you can add attachments to your mails, but adding attachments cannot be done in a task pane app because they are designed for Word, PowerPoint, Excel, and Project.
There is another thing, not all the apps have the same dimensions. So you need to direct your client to the correct location on your site for that app shape or type.
Adding redirection to your app
If you are working with different app shape dimensions, it is best that you create a page per type of app. In my example I have created a page for my mail app, and my task pane app. The routing to the correct page can be done in different ways. The simplest way to do it is to change the URL in the app manifests.
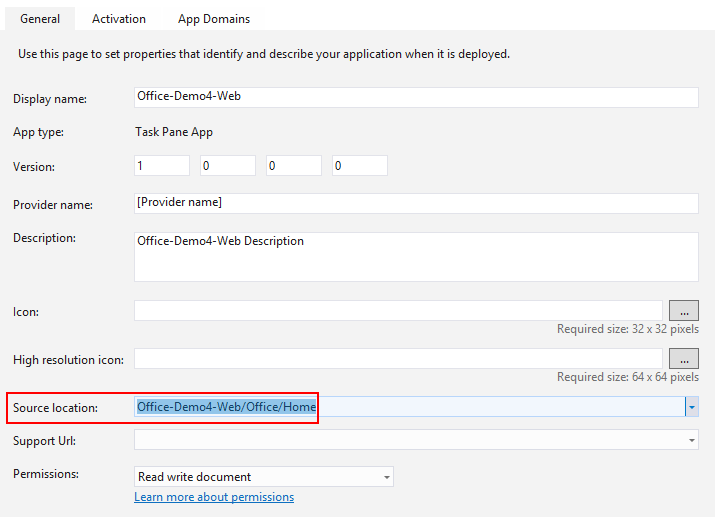
The downside of this approach is that if you need to use Azure AD authentication, the redirect URL will be the same for the two app shapes. So you best do the redirection for your app via code.
My approach is to first add a query string parameter “office” to the source location of my app manifest of your task pane app like this:

Note: if you are working with two app manifests, you only need to do this in one app manifest. If you are combining more, you should do add some other query string parameters to the other manifest.
By adding a query string parameter the landing page stays the same in the two manifests, but you have something you can use to check from what context your app gets loaded.
The first thing to do in code is to check if the query string parameter is in place, and if that is true, store that in a session. By storing it in a session, you can easily check it in a later step of your code in which context your app is running.
if (office !== null){ Session["Office"] = true;}The redirection can be achieved by checking if the office variable is stored in the session.
var officeClient = Session["Office"];return RedirectToAction(officeClient != null ? "Office" : "Mail");I used this approach to create an app that needed to work in Outlook and Word. It also used Azure AD authentication. This way I only needed to register only one app in Azure AD and if the token got retrieved, my app redirected the client to the correct page.
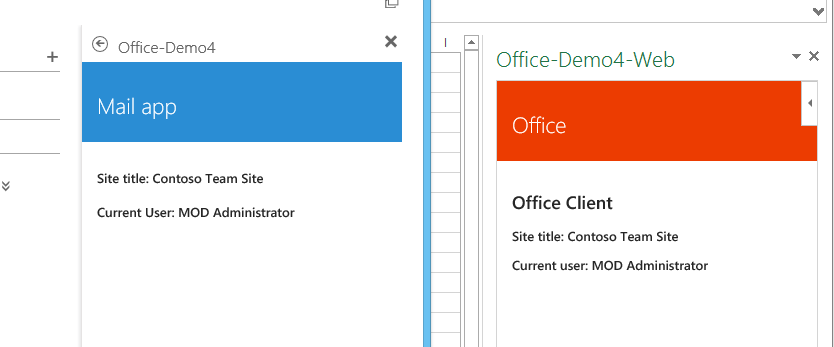
By implementing something like this, you could easily combine apps into one global app site and let them use the same code base.
Related articles
Things you need to know when implementing Azure AD in your Office add-ins
Find out in which Office rich client your Office APP is opened
Three useful managed properties for working with Office Web Apps
Report issues or make changes on GitHub
Found a typo or issue in this article? Visit the GitHub repository to make changes or submit a bug report.
Comments
Let's build together
Manage content in VS Code
Present from VS Code
Engage with your audience throughout the event lifecycle
